How to Setup a Hikvision Camera with Camcloud
Let’s show you how to setup a Hikvision Camera with Camcloud.
Step #1. Setup the Camera Wizard
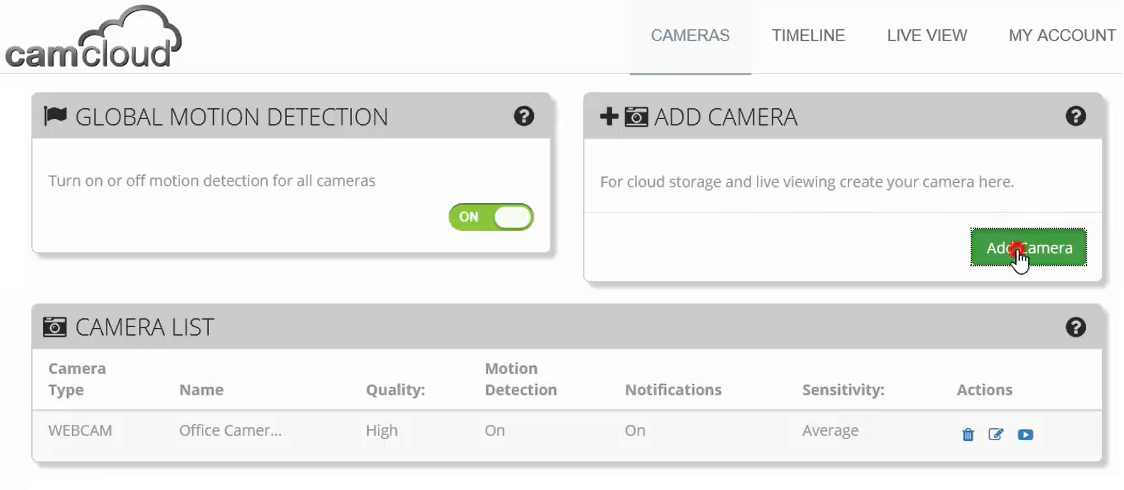
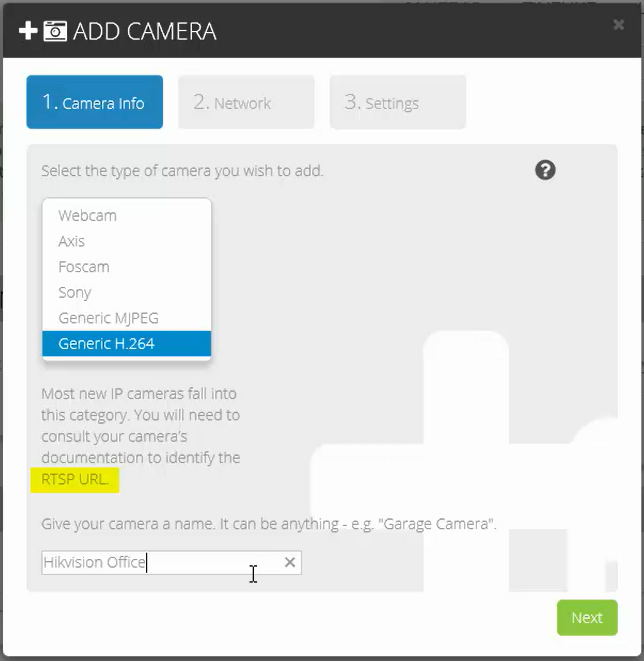
First login to camcloud.com and go to the “Cameras” page. Then click on “Add Camera” to start the Camera Wizard. Since we’re dealing with Hikvision cameras, select “Generic H.264”. At this point, what you wanna do is make sure you know your camera’s RTSP URL.
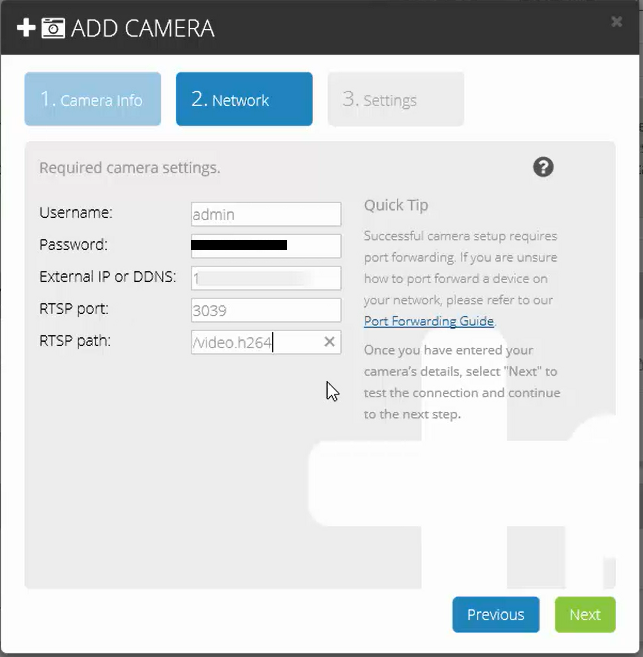
Now click on “Next” and fill up your info in the Network Setup. Make sure you use your camera’s password for the Network Setup, not the Camcloud password.
The RTSP port allows us to pull video from the camera. For the RTSP path (also known as the RTSP URL), punch in “/video.h264”. All I did to figure this out was to take a look at the documentation from Hikvision, and this is what the RTSP URL looked like.
If you’re not sure what yours is, just contact support@camcloud.com and we’ll help you figure it out.
Once you’re done, click on “Next”, and if it goes through it means you were successful at pinging the camera which means our Network Setup is complete.
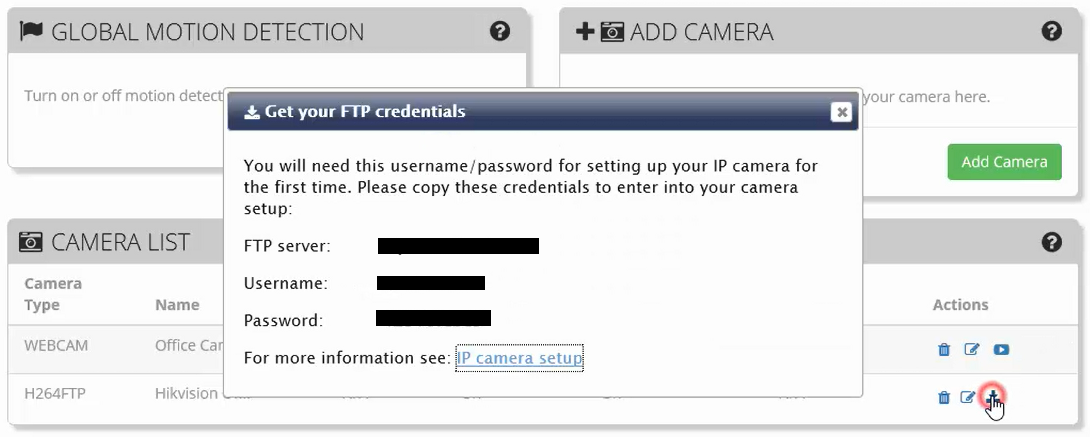
Side note: When we we first pop-up the dialogue to enter your FTP Credentials, we say ftp.camcloud.com is what you should use, but that doesn’t work for Hikvision Cameras. Instead, you should enter an IP, so ftp.camcloud.com doesn’t work on some models of Hikvision. You’ll have to use an FTP IP, which you can get by contacting support@camcloud.com.
Before you head over to the interface, make sure you’ve taken note of your FTP Credentials. You can find them on the cameras page here:
Step #2: Hikvision FTP Setup
Now go to the Hikvision Camera Interface and click on the “Configuration” tab, then under “Advanced Configuration” click on “Network”. Now click on the FTP tab.
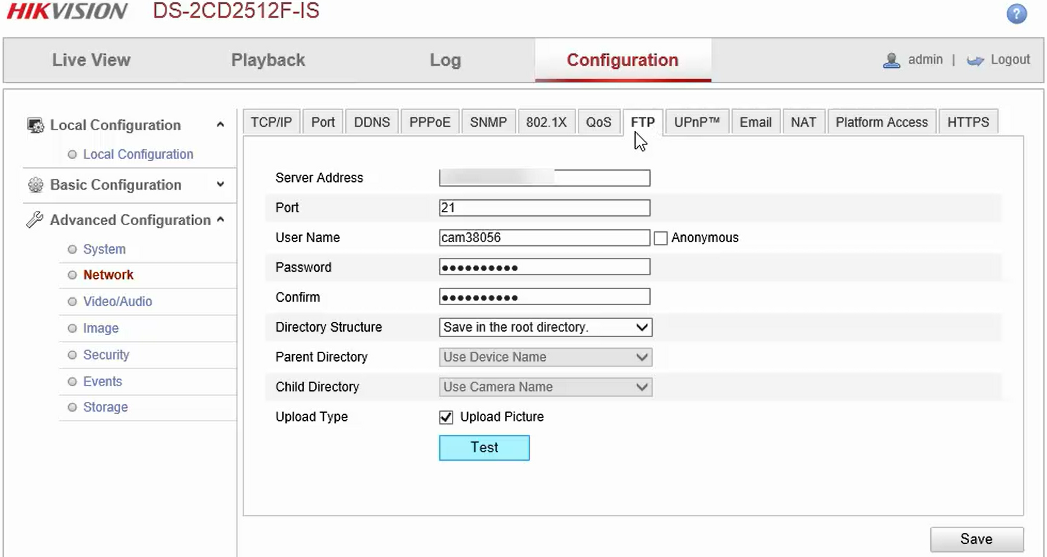
This is where your FTP credentials are required. Keep in mind that the interface as of now doesn’t allow you to copy and paste the passwords in, so you’ll have to manually enter them both times.
Make sure the “Upload Picture” checkbox at the bottom is checked. Click on “test”, if it’s successful it means that you’ve configured with FTP correctly.
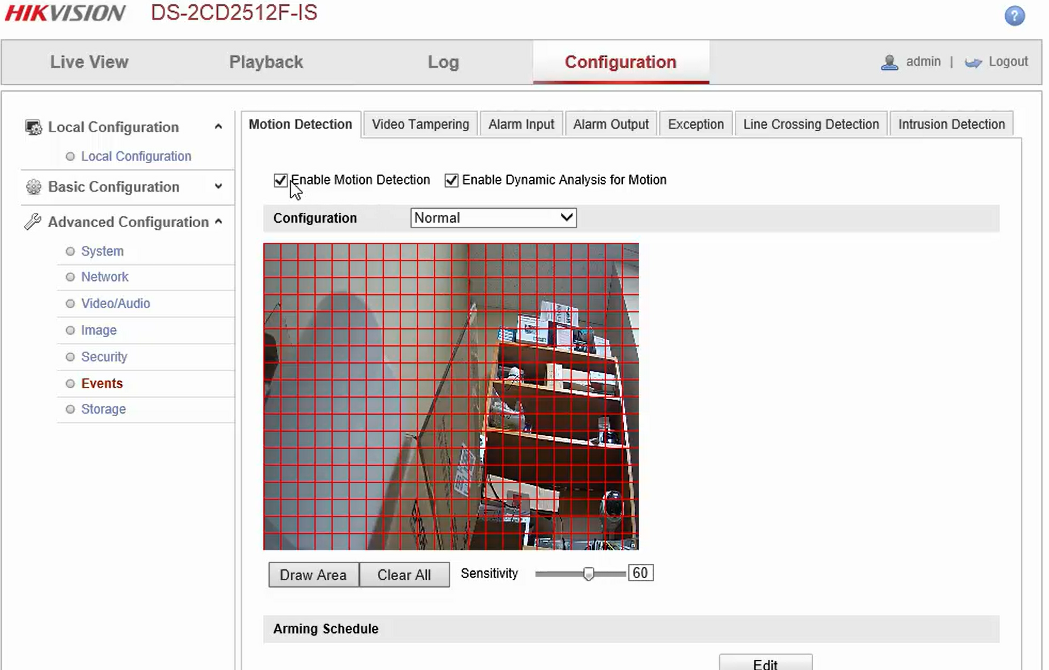
Step #3: Hikvision Interface Event and Storage Configuration
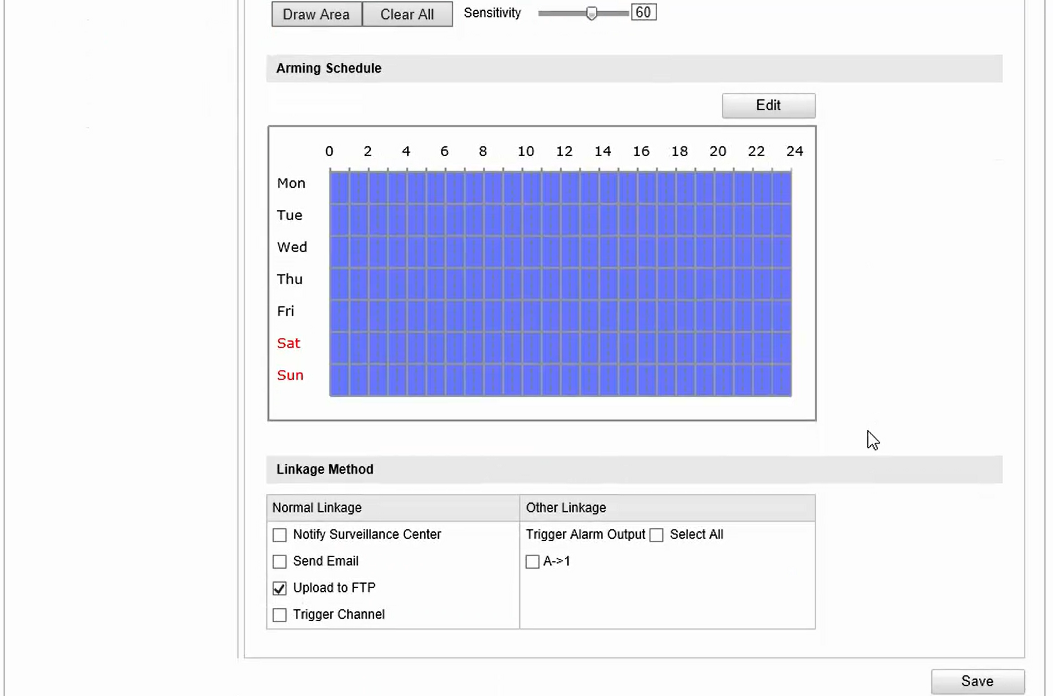
Once again under “Advanced Configuration”, click on “Events”. Make sure your Motion Detection is enabled and that you have a Motion Detection Area selected.

Scroll down, and under Linkage Method make sure “Upload to FTP” is checked.
The Last Step is to jump over to “Storage”, and click on the Snapshot tab. Scroll down and check on the “Enable Event-Triggered Snapshot” checkbox.
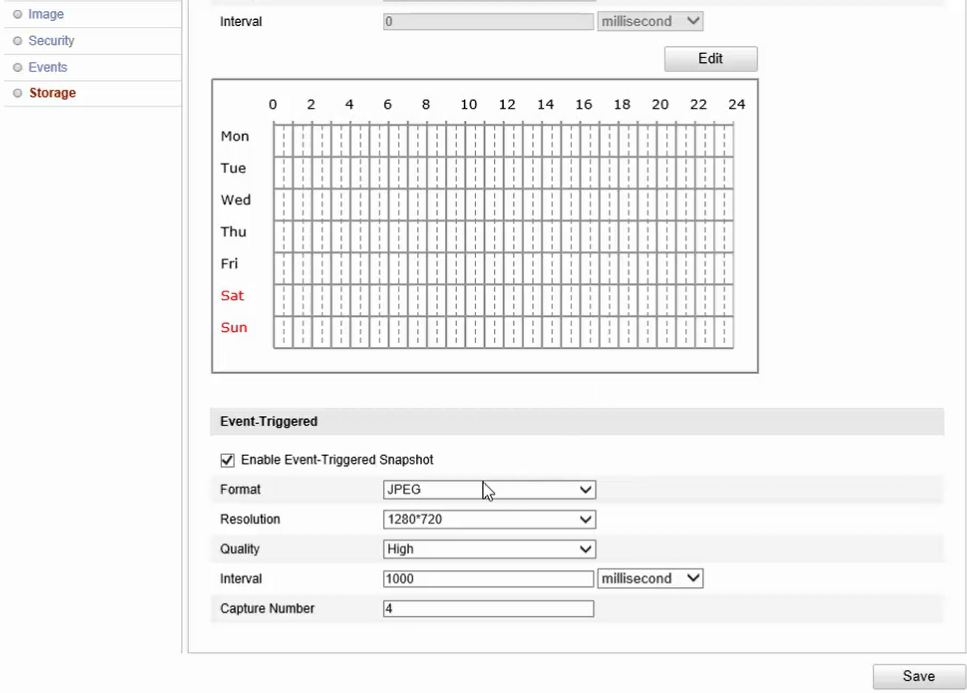
Now you’re ready to use cloud storage with Camcloud and your Hikvision camera. Now when there’s motion in front of the camera, you’ll be able to see what kind of motion activity was captured by the device.
Let us know your thoughts in the comments below.
Got questions? Contact us at support@camcloud.com.
John Snyder
Posted at 18:10h, 18 JanuaryI Have 8 HikVision IP cameras and an NVR (DS-7608-E2/8P). The NVR records continuously.
I would like to put some cameras on Camcloud, but still keep them on the NVR. If the NVR is stolen I’ll still have some files on the cloud. Is that possible, and how would it be done.?
Brendan Harrison
Posted at 18:58h, 03 AprilContact our partner team at partner@camcloud.com and we can connect you with a security integrator who can set you up with our Business Plans that include NAS support.
A Blog that Covers the Latest in IP Cameras, Home Automation and Video Monitoring. | Tutorial: How to Setup Network Attached Storage (NAS) for your Hikvision IP Camera
Posted at 15:11h, 30 April[…] configuring an “Event” and assigning a “Linkage” to the NAS – Step #3 of this post on how to setup a Hikvision camera with Camcloud shares the basic concepts which should get you going. Beyond that you can adjust other settings […]