Tutorial: How to Setup Network Attached Storage (NAS) for your Hikvision IP Camera
Setting up local video storage for your IP camera is a very common requirement, even if you are using cloud storage as the primary storage for your IP camera, many customers will still want to have redundant, local storage in case there is an Internet outage. The good news is this can easily be accomplished with almost any medium-range and up IP camera, and even some cloud video surveillance platforms allow local storage options to be easily configured and retrieved from the cloud apps.
This post will walk you through the steps for setting up Network Attached Storage (NAS) for your Hikvision camera, including a few “gotchas” we’ve learned along the way. (This post will focus on NAS setup, we will create a separate article for SD card setup.)
Important: The Gotchas you Need to Know
The first step is to prep your NAS so it is ready to accept video saved from a Hikvision IP camera. (Our screenshots are from a QNAP device but these steps are generally true for any device.) Before beginning there are a few upfront “gotchas” you need to know.
- Most Hikvision cameras can only support writing to one local (or edge) storage device at a time, so don’t attempt to write to multiple devices.
- Hikvision cameras require a dedicated partition for their IP camera. This is probably the most important (and surprising!) requirement so be sure you have done this.
- Each camera writing data to the partition requires its own share folder. (This is a good idea to keep your data organize anyway.)
Setup Steps
Step 1: Basic NAS Setup. Begin by, (i) ensuring your NAS basic setup is complete according to its user manual (general setup, firmware updates, etc), (ii) you have your login credentials handy, (iii) the NAS is connected to your local network (including identifying its internal IP address), and (iv) you can reach the NAS UI from your web browser.
Step 2: Basic Hikvision Setup. Ensure your Hikvision IP camera is connected to the same network as your NAS.
Step 3: Create NAS Partition. Follow your NAS instructions for creating a partition — if using a new or separate hard disk drive (HDD), create a partition on that particular drive. In the case of QNAP, this is located in the Storage Manager settings but you’ll need to follow your NAS detailed guides for this step.
Step 4: Create Share Folders. You will need to create a share folder for each camera that will be using the NAS. Name each share folder a name that identifies with the camera being used, for example: Camera_1, Camera_2, Camera_3… etc. (It’s recommended that you don’t use any spaces in your folder names.)
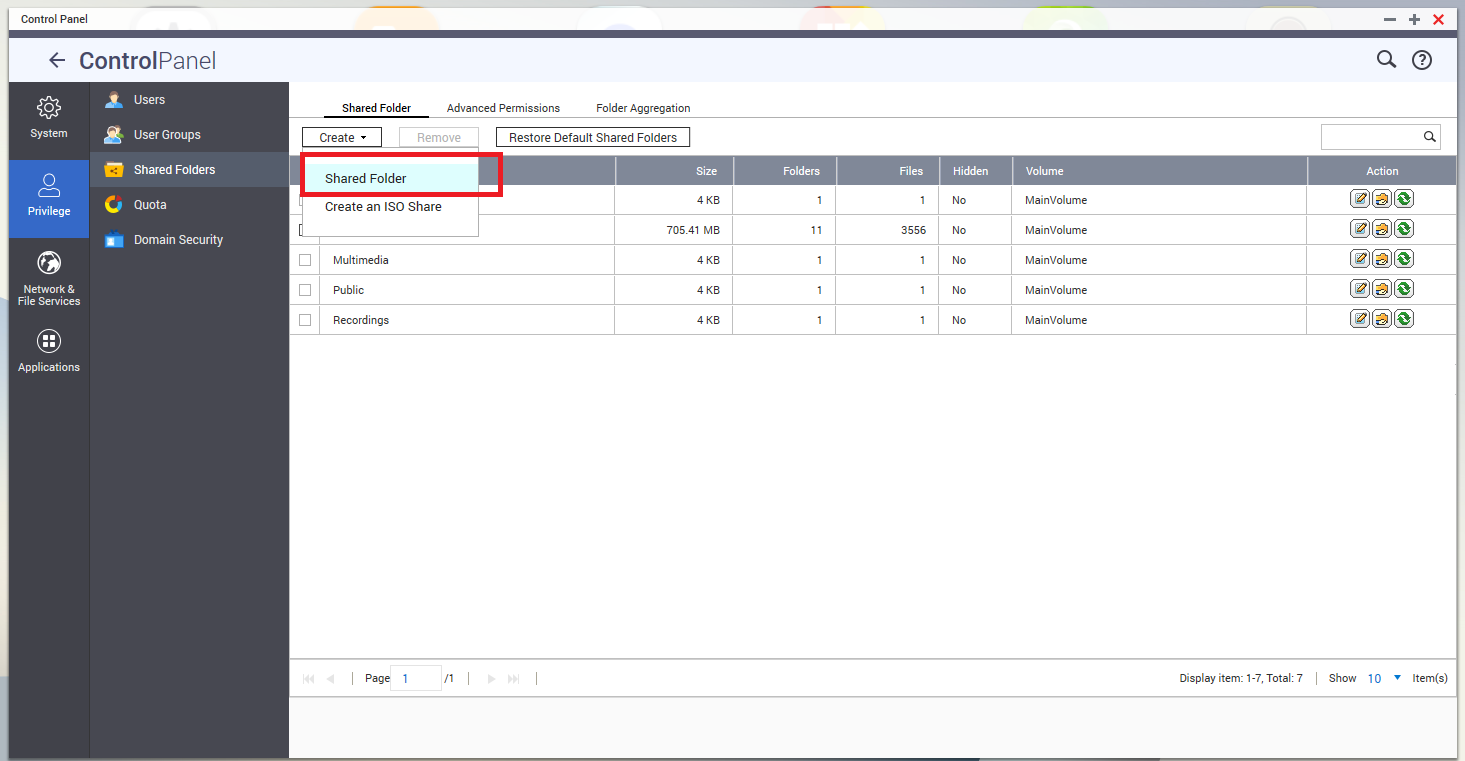
Figure 1: Shared Folder Menu on QNAP

Figure 2: Shared Folder Options on QNAP
Step 5: Hikvision Storage Setup. Now you’re ready to configure your Hikvision camera storage options. First you’ll need to make the camera aware of the new storage location. This can be done under the following menu: Storage -> Storage Management -> Net HDD. Screenshot below shows where this is done. Here you click on any slot and fill in the server address (internal IP of the NAS) and the file path (share folder you created in step #4). Also enter the username and password of the NAS. Leave the mounting type as NFS if it’s a dedicated partition. Use the Test button to validate connectivity to your NAS.
Step 6: Configure your Hikvision camera recording settings. This is probably worth a blog post in and of itself, but the basic idea is you need to configure the Hikvision IP camera so it knows when you want the camera to record (motion detection, scheduling, etc) and where you want it to record (in this case, the NAS). This is done by configuring an “Event” and assigning a “Linkage” to the NAS – Step #3 of this post on how to setup a Hikvision camera with Camcloud shares the basic concepts which should get you going. Beyond that you can adjust other settings with the Storage -> Schedule Settings -> Record Schedule menu to select motion or continuous based recording to the NAS.

Figure 3: Hikvision Storage and Event Config
There is a lot more to this topic than can be covered in a short blog post, but these are the main steps and you are now also aware of the main stumbling blocks to getting NAS recording setup for your Hikvision camera!
Also, FYI if you want to use local (or “edge”) recording in conjunction with cloud-based storage, Camcloud offers that capability. Our platform allows you to setup cloud storage as your primary storage location and the camera’s edge storage as a form of redundant storage. And you know the best part? Our apps make it easy by ensuring the right configuration settings are applied to the camera, making it easy to setup and get going. If you’re interested, read more about our cloud video surveillance and edge storage solution.
yogender singh rawat
Posted at 07:56h, 29 Octoberstorage management option not shoing