VIVOTEK IP8132/8133 Setup with Camcloud
Before starting I suggest reading Quickstart – Setup an IP Camera with Camcloud.
Vivotek has great quality and tons of features but the setup is terrible. I’ll try to walk you through it. Forget about following the quick start, it is misleading. Another thing to be aware of is that the browser support is less than ideal. Eventually I got it to work in Firefox and Chrome but as a start I’d recommend sticking with Internet Explorer.
I suggest going to the Software utilities and click on Installation Wizard 2 (twice). This should install a program on your computer.
Now open up Installation Wizard 2 which should be installed on your computer and it will look like:

The next two tabs for ports and DDNS can be skipped for now (very useful DDNS setup). You will receive a popup about Mobile access setup, you can select No for now.
Here is where it will find your device. Now select that device and select the two arrow button to open further options. Now you can select “Manual setup”.
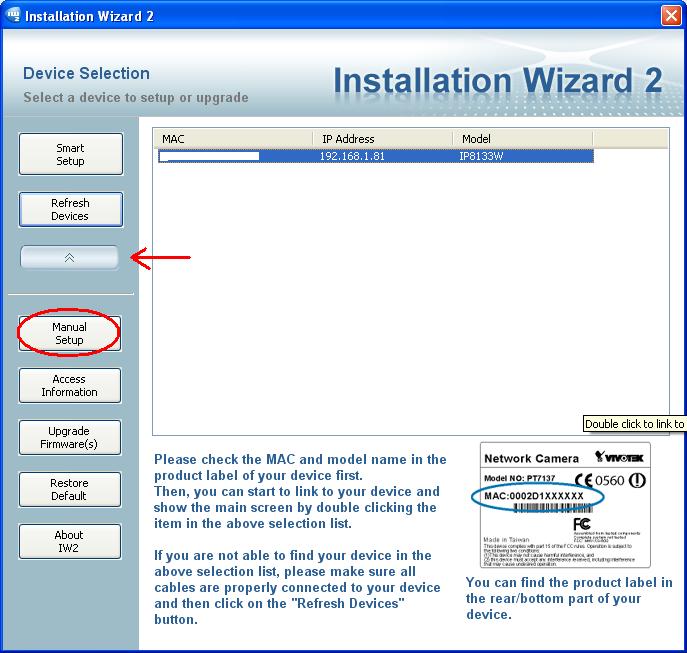
You can try the “Smart Setup” button which is easier but I’ve never gotten this to work. Okay, moving on, it will then ask you to setup a password for root. A dialog will ask you to setup PPoE, select No.
Setup the IP, I recommend creating a static IP for this camera and more importantly adding DNS servers. Select an IP value, it doesn’t really matter what value you use and make sure to use the appropriate value of your router. This varies depending on the router type, for example:
| Default Router | Dlink, Netgear | Linksys | Belkin, SMC | US Robotics | Airport Extreme |
| Address | 192.168.0.1 | 192.168.1.1 | 192.168.2.1 | 192.168.123.254 | 10.0.1.1 |
For DNS use 8.8.8.8 and 8.8.4.4.

Then it asks you to setup wireless. Simply enter your wireless details and you’re ready to go. Be careful with these settings make sure you know what types of options you have for your wireless. Finally “Apply” the changes.
Wait until all processing is done and then you can unplug the LAN cable, You should be on wireless now.
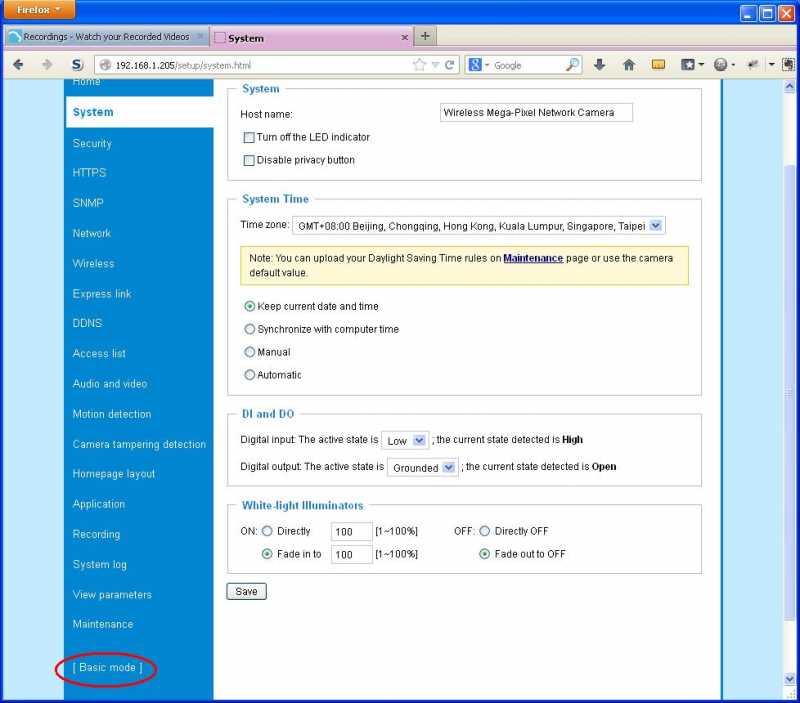
A new window should open like the one below with a link to your camera’s admin page. If not, just enter in the camera IP you created earlier into the browser. In my case it was 192.168.1.205.
You should see a view of the camera and at the very bottom on the left should be a “Configuration” link. Click that to go into the camera configuration. Also at the bottom with be another link called “Advanced mode”. Select that and new menus will appear.
Now let’s setup up motion detection (again remember IE is your best bet). Going to the Motion Detection tab you need select “Enable motion detection” and click the New button. This will create a new motion window area to detect motion. Enter a name for the window. Motion will be detected within the area that you select, and will be ignored outside it. I normally select the entire window. Increase sensitivity and percentage. The percentage meaning the variation between sequential images (think of this like the size of the object); play around with these settings for optimal motion detection but a good starting point I found was 90% for sensitivity and 20% for percentage). Hit Save.

Now go to the Application tab and click the Add button for an Event Setting.
– Add an Event name (anything)
– Click “Enable this event”
– Select the trigger “Video motion detection” and select the motion detection window you created
When your done it should look something like this:

Before you hit Save, you need to “Add Server” at the bottom. Remember the credentials you have for your FTP camera, enter them here. Note: Select the “Test” button which will verify you have entered the credentials correctly.
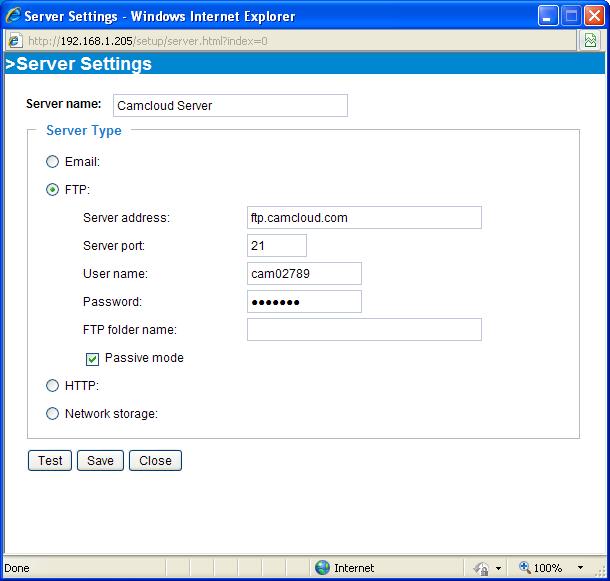
Now hit Save for your Server Settings (It doesn’t actually close the window, so you need to do that).
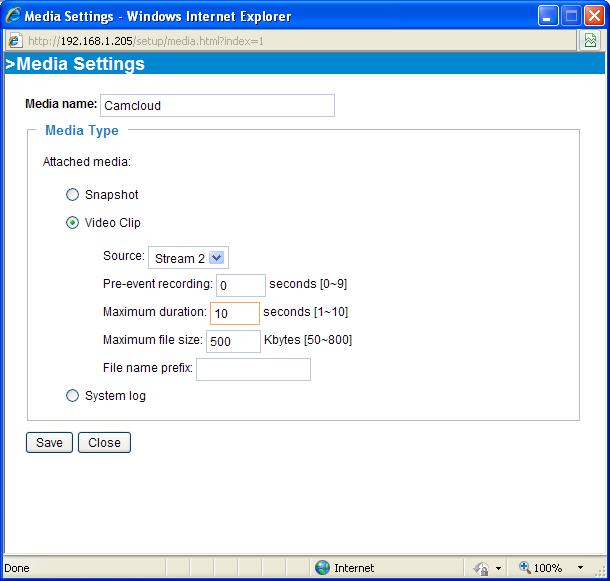
Next we need to add media with the “Add Media” button (which was next to “Add Server” button). Here I changed it to Video Clip, changed to Stream 2 and changed Maximum duration to 10. I would also add pre-event recording to 1 or 2 seconds and change the Max file size to 800 to give you the longest possible video. Save and Close.
Now you will have to go back into your Event settings and at the bottom select both the Server and Media options you created. This is quite confusing and I found that I had to start it over again. Once you do sort that out hit Save for your Event Settings. This is what it should look like:

One more thing to do. You need to configure the Vivotek MJPEG stream to be used for the Camcloud Live View. We need to change stream profile 3 to handle that. Go to the “Audio and video” tab. Select “Video quality settings for stream 3:” and select JPEG as the stream and hit Save.

You are all setup for motion detection with Camcloud. Wave in front of your camera and then go to the Camcloud Recordings page.
One extra special note of importance. You may find that your videos are quite small, in the range of 3-4 secs. Vivotek allows 10 sec videos but they bump up quality settings so it ends up being too big to send. You can go to the Audio and video tab and change Stream profile 2 settings. A quick example would be to set the default 30 fps to 20 fps. Play around with these and you will find the right combination for your needs.
No Comments